The Opala Solution
Creating an Opala Account Registering as a Developer with Opala Working with Your Profile

Registering an Application Maintaining an Application Register a New Version of an Application

Registering as a Payer with Opala
Transferring Member Health Information Registering Your Organization with Opala

Application Gallery
FHIR for CMS Interoperability Opala's FHIR Servers CMS Implementation Guides

Using Opala's Sandbox & Production Environments API Queries Setting Up Postman Setting Up Production API Access Using Bundles with Opala's APIs Response Pagination

The Opala Patient Access API The Opala Provider Directory The Opala Member Attribution (ATR)

Release Notes

© 2021 - 2023 Opala. All Rights Reserved.

Version 1.0.2.0


Contact Opala's
Documentation Team

Registering as a Payer with Opala

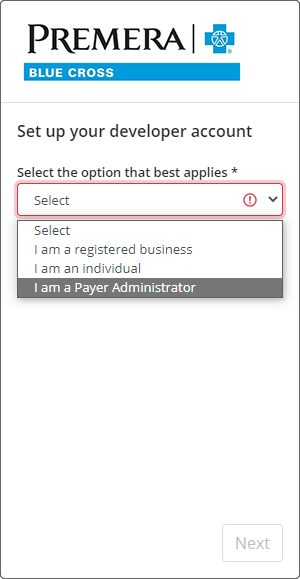
Before you can register as a payer with Opala, you must create an account. After you create your account, the first time you use it the system presents you with three setup pages. Fill out these pages to finish setting up your account.

  1. On the Login page, enter your username and password, then select the Login button.
  2. On the first Setup page, select I Am a Payer Administrator from the drop-down list.
  3. Enter the additional required information, then select the Next button.
    • Your full name
    • The name of your business
    • Your position or designation within the business
    • Your Payer ID
  4. Enter the details for this account.
    • Address lines 1 and 2
    • City
    • State/Region
    • Zip/Postal Code
    • Country
    • Work Phone Number
    • Cell Phone Number
    • Website
  5. Select the Submit button.
    Once you've set up your account and signed in, your Developer Portal page displays.

Note: Payer registration information can be viewed on the Vendor Account page, which is accessed in the profile drop-down in the Developer Portal.

For More Information

Top